|
Ahhhh....summer! Sunny days and warm temperatures lead to a bounty of beautiful fruits and vegetables at the farmer's market. I love this time of year when there is so much goodness to choose from and cooking seems easier - lighter fare with minimal effort until cooler temperatures coax us back to the comfort of hearty soups and stews. Today, I've got one of my favourite salsa recipes to share with you. It's a quick and easy, no-cook appetizer that comes together in 10 minutes. It's savoury, sweet, fresh and tasty and only requires a bit of chopping. It isn't the usual tomato based salsa - this one is made with peaches. It also doubles as a great accompaniment to tacos or chicken and goes well with a glass of wine or better yet - a margarita. Let's make it! Peachy Summer Salsa
2 to 3 peaches, ripe, pitted and diced ½ red bell pepper, diced ¼ cup diced red onion ¼ cup chopped fresh cilantro Juice and zest of 1 lime 1 small garlic clove, grated ½ jalapeño pepper, minced (trust me - it's not too spicy!) ¼ teaspoon sea salt, plus more to taste Mix all ingredients together in a pretty, medium sized bowl and season to taste. Chill until ready to serve. Enjoy with tortilla chips. Told you it was easy! Next time I going to try adding corn to it...let me know if you do.
0 Comments
Well hello.
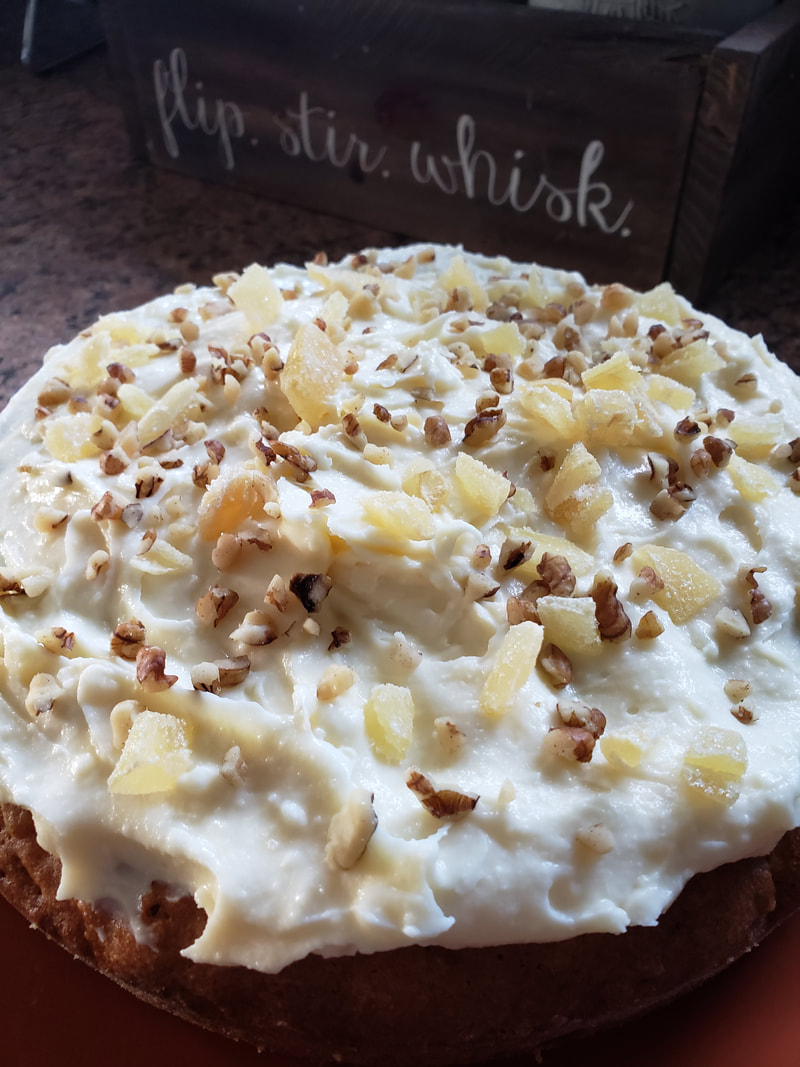
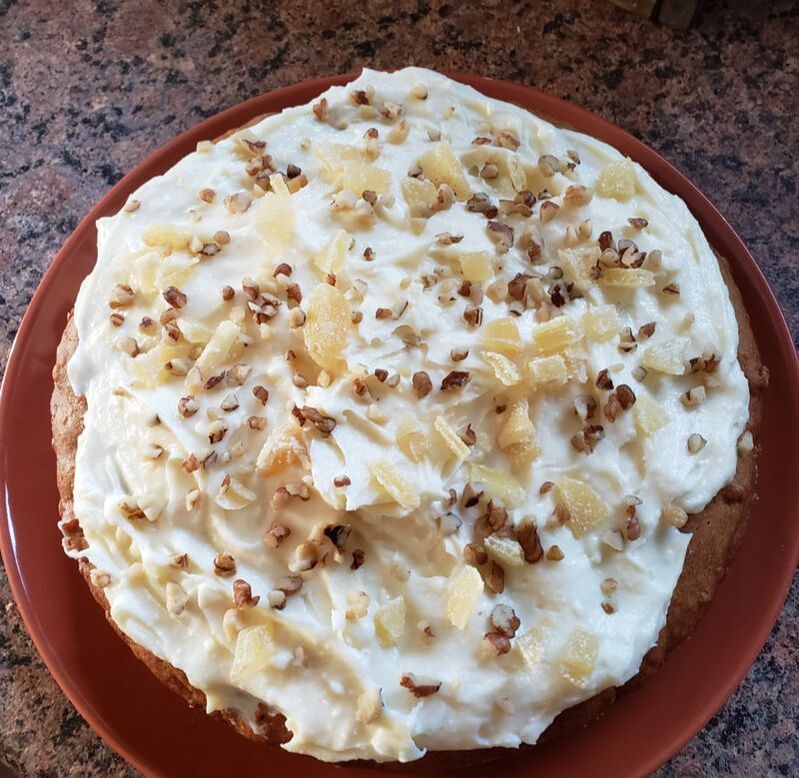
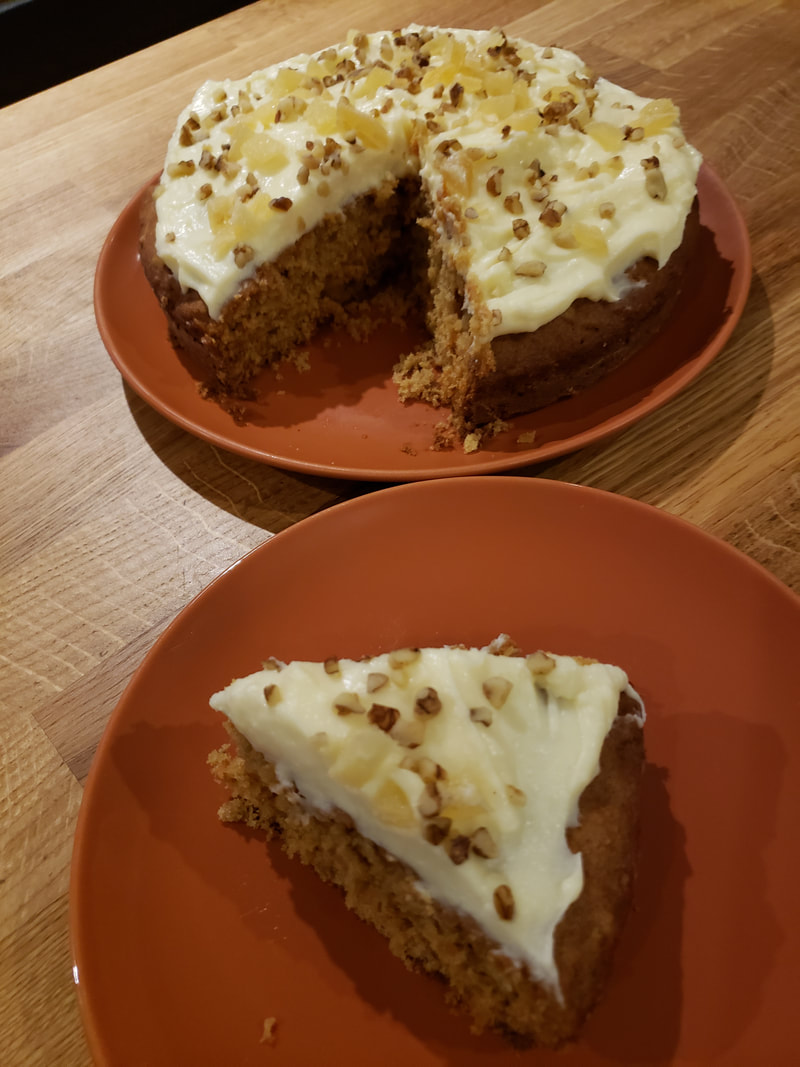
It's been a while...a long while really. Things look a bit different here in the cupboard...I've been doing a bit of tidying up (with a bit more to do as I navigate the IT smarts needed to freshen things up around here) but I will be back very soon with more recipes and some other ideas that are simmering on the backburner...I hope you will come back soon and see what I'm up to. Looking forward to chatting with you soon! Sharon Hi. I’m back…again. I didn’t mean to stay away so long but the days just came and went and soon it was months…and months before I found my way back here. I guess the truth of the matter is, I just didn’t have much to say. Like you Dear Reader, I have been hunkered down at home, waiting for this crazy time we are all going through, to pass. Although we may be going through this together, it hasn’t been the same experience for everybody. Lost jobs, lost homes, births and deaths, huge life events mourned and celebrated behind our masks. I’ve become aware that this pandemic has given me the gift of time and I have been thinking a lot how I have mostly wasted it. Wasted it down the Netlflix rabbit-hole, bingeing my way through mindless, seemingly endless movies and tv series. It’s funny how in the beginning I was so full of motivation – I was going to get SO MUCH DONE! Projects that had been put off for ages could finally be started….and completed! But here we are a year into this and its only recently that I started tackling that to do list. Thankfully, inspiration comes unexpectedly. Maybe it’s the longer, sunny days with their hint of Spring warmth that has me perking up, shaking off the cobwebs and getting starting to get things done. Locked down, comfort food was a bit too comforting…I baked far too much, and far too often. Hearty stews and soups were in constant rotation. Good, stick to the ribs kind of food…and unfortunately my ribs are not the only place it stuck! I made this cake one afternoon when it was a dreary day outside and the house felt dark and gloomy. It’s an easy recipe, not too fussy or taxing to tackle, which if I am being honest, is really the only kind of baking I ever want to do. Enjoyed with a cup of tea, it brought cheer to the afternoon. Enjoy! Ginger Walnut Carrot Cake
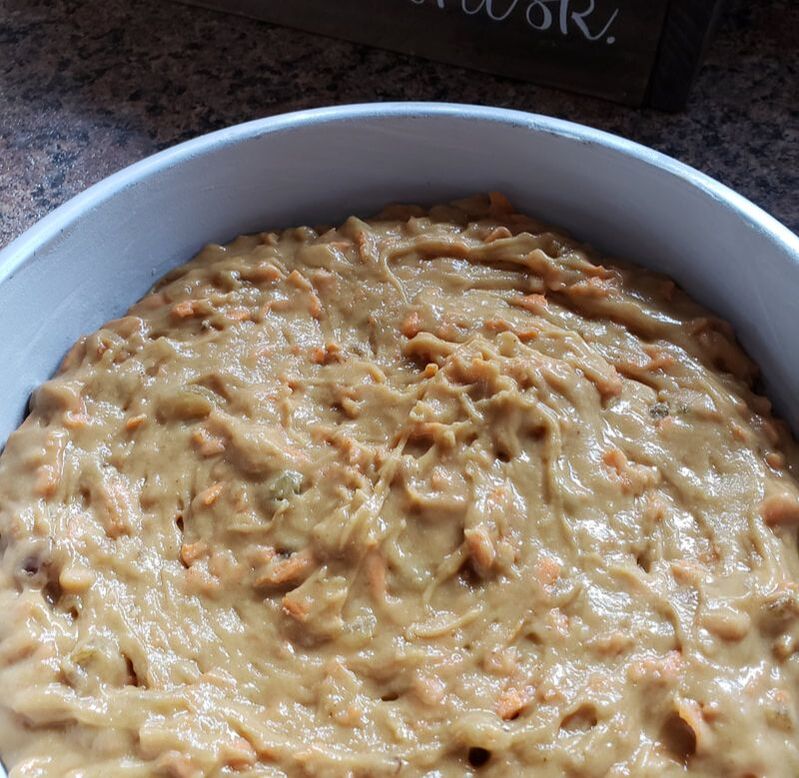
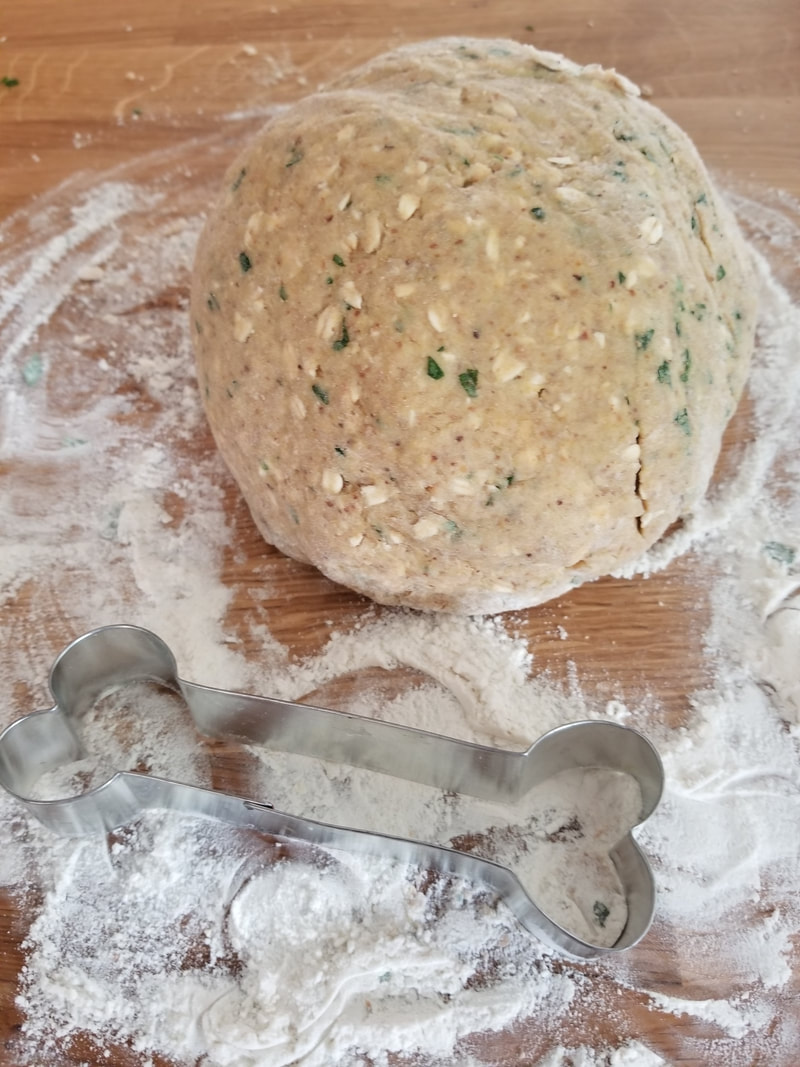
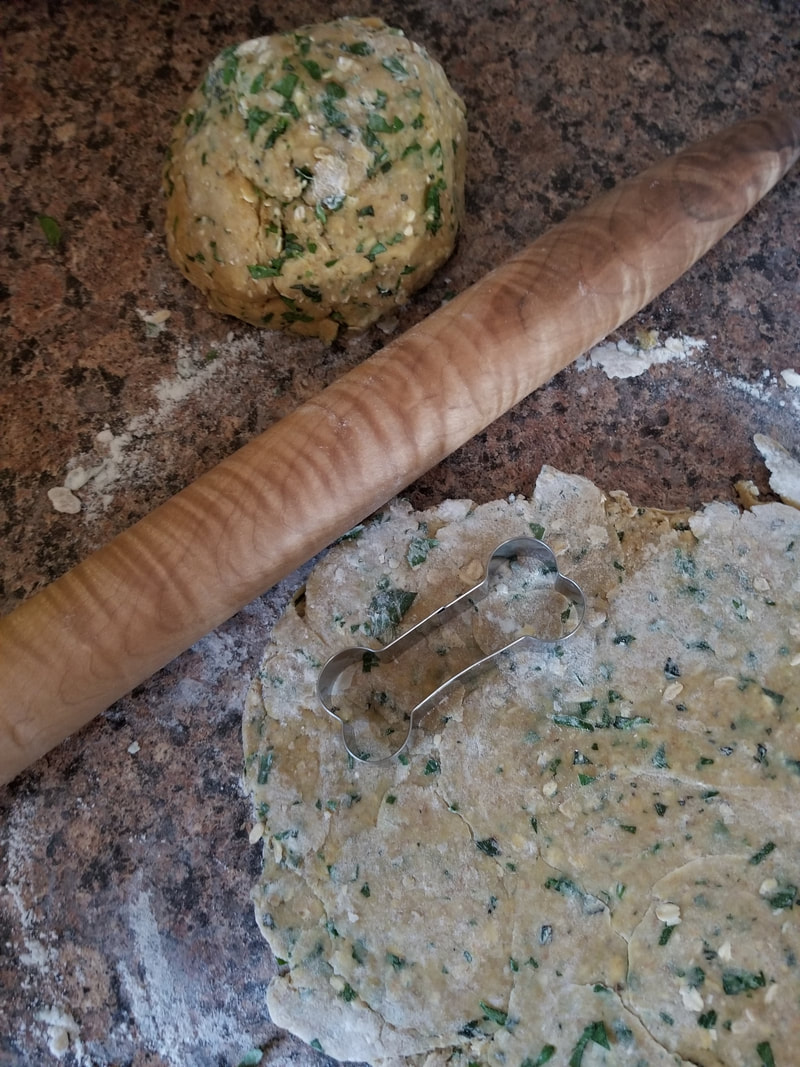
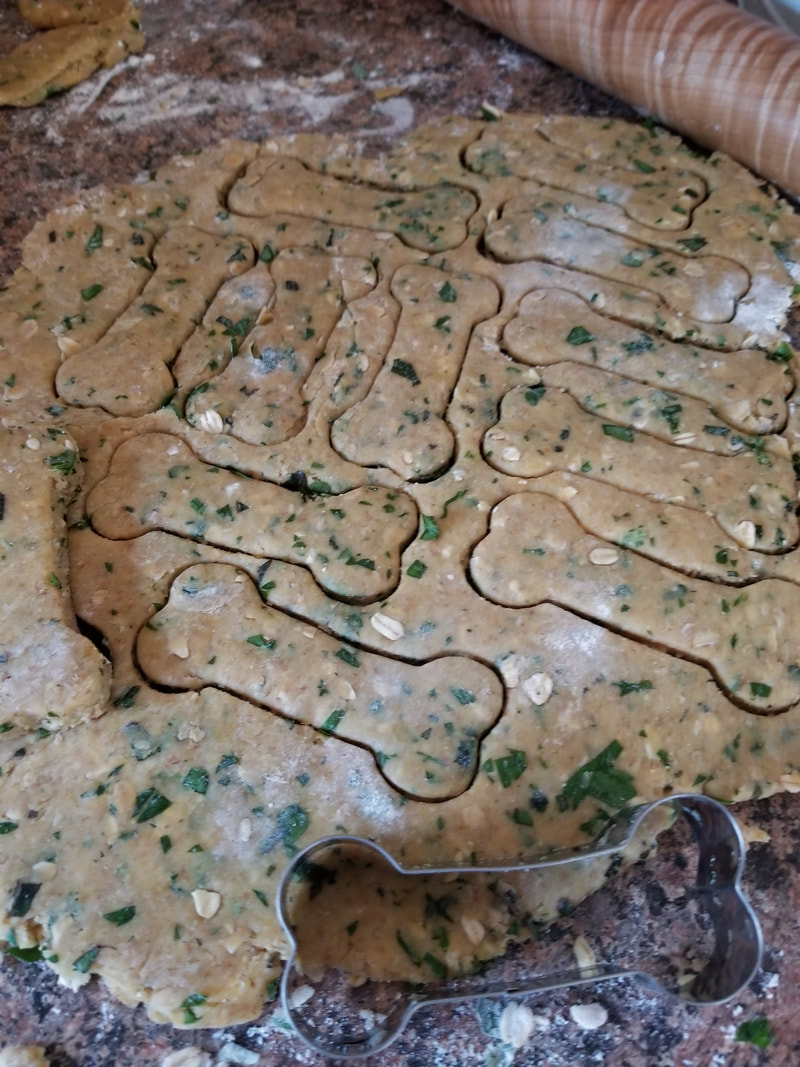
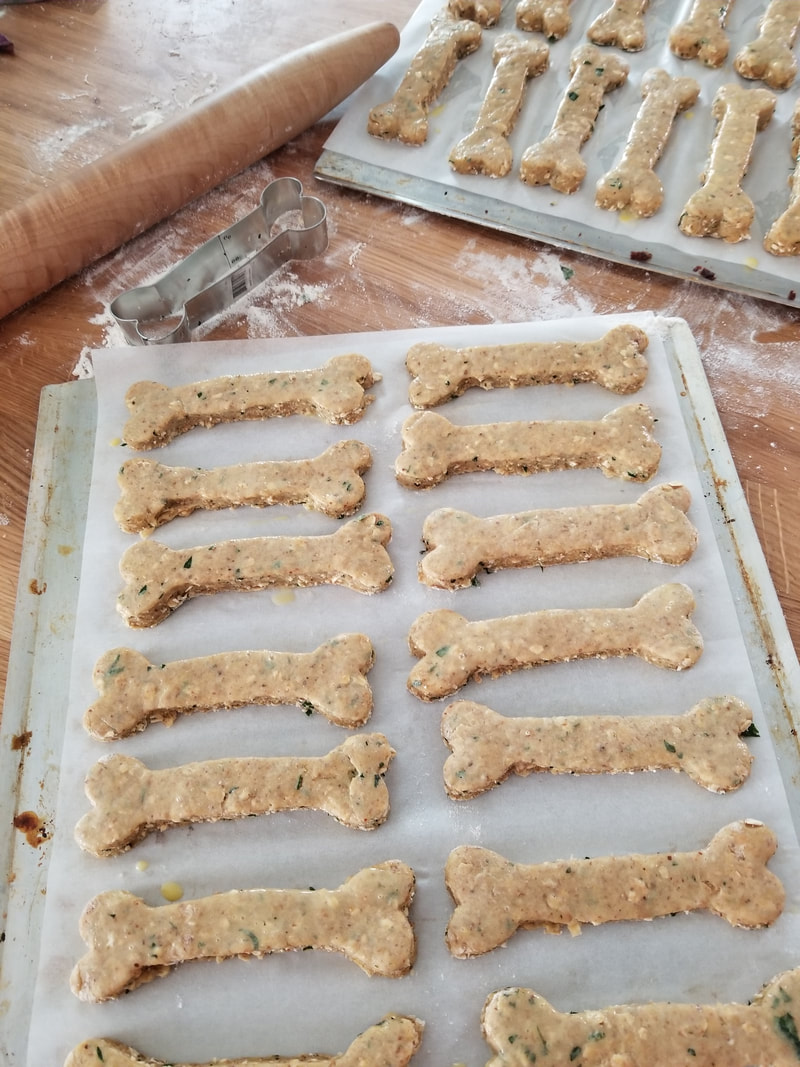
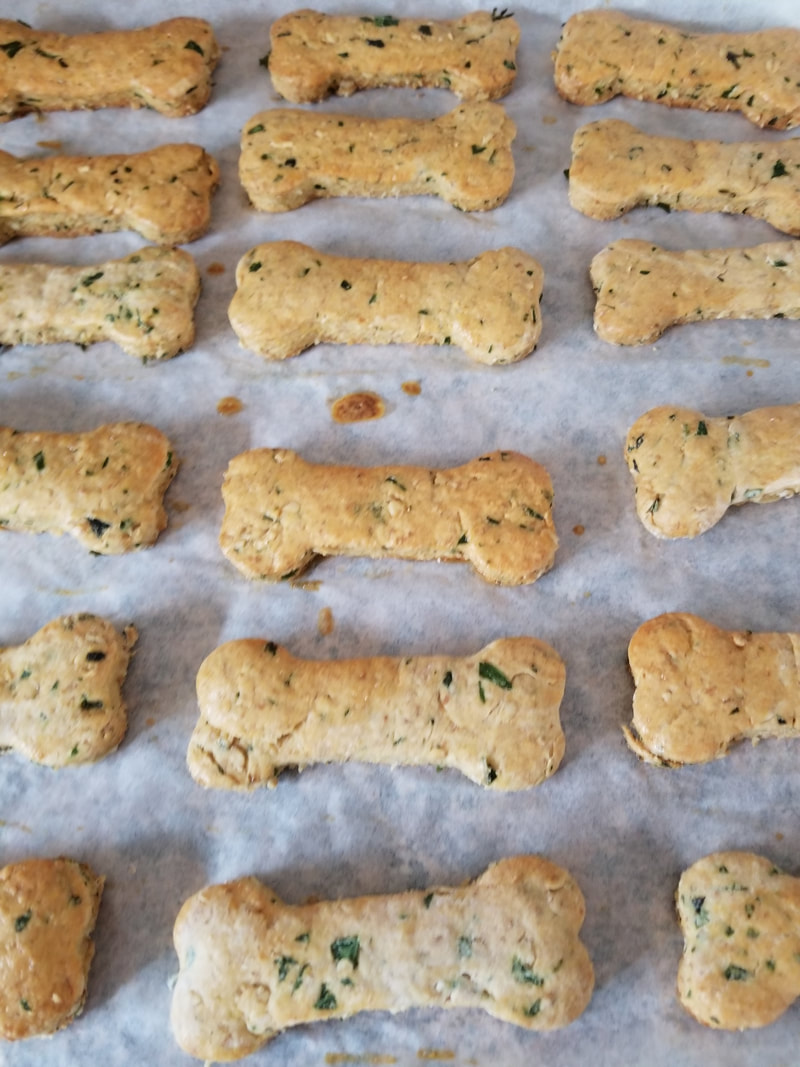
Adapted from “At My Table” by Nigella Lawson Cake: 1⅔ cups all-purpose flour 1 tsp baking powder ½ tsp baking soda 2 tsp ground ginger ¼ tsp fine sea salt ¾ cup brown sugar 2 large eggs (at room temperature) ¾ cup vegetable oil 1¾ cups carrots (peeled and coarsely grated) 1 cup walnut pieces (roughly chopped) 4½ tbsp candied ginger (finely chopped) Icing: 7 tbsp unsalted butter (soft) 1 cup confectioners' sugar (sieved if lumpy) 1 tsp cornstarch 4 oz full-fat cream cheese 1 tbsp fresh ginger (coarsely grated) ¼ cup walnut pieces (roughly chopped or crumbled) 1½ tbsp candied ginger (chopped) Preheat oven to 325 degrees. Grease and line bottom of a 9 inch cake pan with parchment paper and set aside. Put the flour, baking powder, baking soda, ground ginger and salt into a bowl and whisk together until mixed well and set aside. Next, in a large bowl, beat the sugar, eggs and oil until they are really well mixed. Gradually add the flour mixture, making sure to scrape down sides of bowl as you go. The mixture may seem quite stiff at this point but the addition of the carrots will loosen it up. Add the carrots and then fold in 1 cup of chopped walnuts and 4½ tablespoons of candied ginger, until it is all evenly combined. Pour batter into the prepared cake pan. Smooth the top and pop in the oven for 45–55 minutes. When it’s ready, the cake will be golden brown and beginning to shrink away from the edges of the pan and a cake tester will come out with a few crumbs stuck to it. Transfer to a wire rack and leave to cool in the cake pan. Prepare the icing: Beat the butter and confectioners' sugar together until creamy, then add in the cornstarch, followed by half of the cream cheese. Once well mixed, add the remaining cream cheese. Beat until combined, taking care not to overbeat as the icing will become runny. Next, place the grated ginger into a double layer of paper towel and bring up corners to form a beggar’s purse. Hold the ginger over a small bowl and squeeze out ginger juice. Add this to the frosting and mix gently until combined. Cover and refrigerate. Once the cake has completely cooled, take icing out of fridge and let sit for 20 minutes, until it was softened to a nice, spreadable consistency. Remove cake from the pan and place on your prettiest plate or cake stand. Evenly spread the frosting on top of the cake creating little swirls as you go. Sprinkle the top with the remaining chopped walnuts and candied ginger. Makes 8 to 12 slices, depending on how greedy you’re feeling. Last summer feels like the summer that wasn’t to me. I spent two months of it home, recovering from surgery and just like that, it was over. We didn’t go on any of our usual day trips, like visiting farmers markets and small town main streets as I just wasn’t up to it. I really missed those weekend adventures, especially tonight as we are hunkered down in the middle of a snow storm. It has me reminiscing... We did take one little trip as summer was coming to an end, and it was the highlight of that lost summer for me. My husband has a friend, a former colleague, who had moved to Bracebridge, Ontario a few years ago and although we had talked about visiting many times, it had just never worked out until then. I had never met Kevin and Bonnie until that weekend and I will admit it pushed this introvert a bit out of her comfort zone to be staying in the home of people I had never met. But my nervousness was for not – they were warm and welcoming and instantly put me at ease. Their home is a beautiful, log cabin, nestled in amongst the trees. When I was trying to decide what to take for a hostess gift, Adrian was no help at all. He had been once before to go golfing, but could not remember anything about the house other than Monty, their dog. Clearly coordinating tea towels weren’t an option. Then it came to me…Monty! I would bake him doggie biscuits. The Christmas before I had made a few batches for my niece Kayla’s dog walking clients and they were a big hit – and were with Monty too. Bonnie has text me since then to tell me that he longingly looks at the cookie tin and only likes my cookies now. The dough freezes well so when we visited again in the Fall I took discs of the dough that they could bake off as Monty’s stash ran out. I have become his “dealer”. Monty’s Doggie Cookies
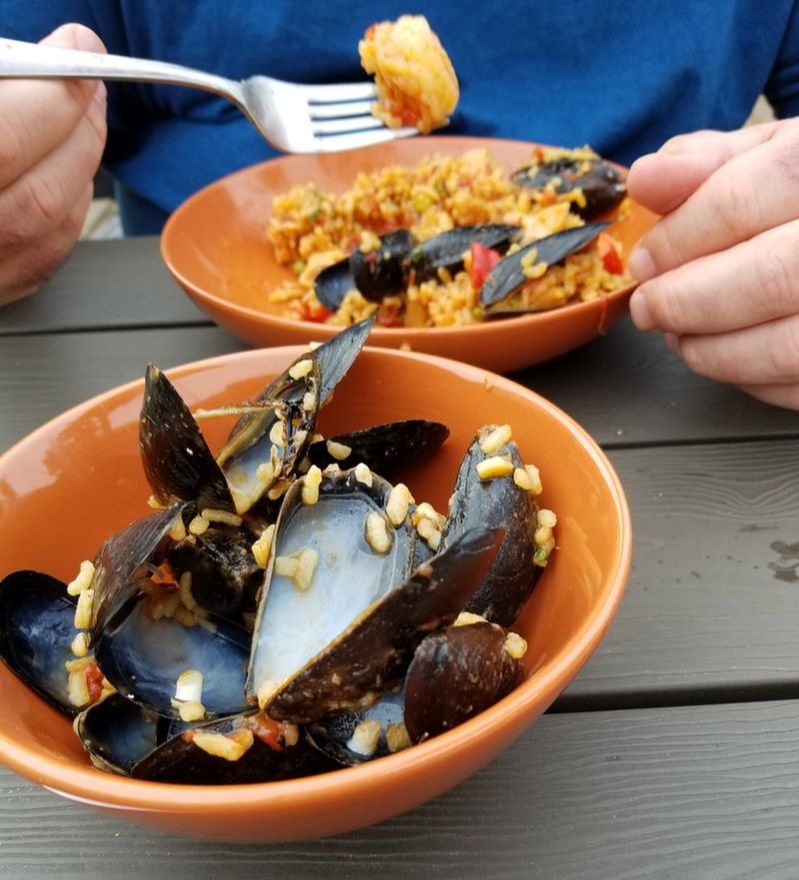
Adapted from Gourmet Magazine, December 2005 issue 1 1/4 cups all-purpose flour 1 1/4 cups whole-wheat flour 1 1/4 cups cornmeal 1 1/4 cups old-fashioned rolled oats 1/2 cup toasted wheat germ 1/2 cup packed light brown sugar 1 tbsp baking powder 1 1/2 tsp salt 3/4 cup cold unsalted butter, diced 1 cup plus 1 tbsp water 1/2 cup chopped fresh flat-leaf parsley 1/2 cup chopped fresh mint leaves 1 large egg Put both flours, cornmeal, oats, wheat germ, brown sugar, baking powder, and salt in food processor and pulse until combined. Next, add butter and pulse until mixture resembles coarse meal with pea-size butter lumps. Add 1 cup of water and pulse until a coarse, dense dough forms. Next, turn dough out onto a lightly floured surface and knead in parsley and mint until distributed throughout. Divide dough in half and form into 2 balls. Flatten each into a 6-inch disk. Put oven racks in upper and lower thirds of oven and preheat oven to 350°F. Line baking sheets with parchment paper. Roll out one disk of dough to 1/3” on a well-floured surface with floured rolling pin. Cut out as many cookies as possible and space about ¼” apart on baking sheet. Gather scraps and reroll, then cut out more cookies and repeat with remaining dough. Whisk together egg and 1 tablespoon water. Brush cookies with egg wash and bake, switching position of sheets halfway through, until tops are golden brown, about 35 minutes total. Allow cookies to cool completely. Biscuits will keep layered between parchment paper in airtight container at room temperature for one month. Makes 60 cookies, depending on size of cookie cutter. The day started early…too early for me, especially on less than three hours sleep. I have been off recovering from surgery for the past 6 weeks and it has wreaked havoc on my sleep schedule. But, a deal is a deal and I had agreed to get up and head on down to the St. Lawrence Market for all the ingredients we would need to make Paella for dinner that night. I always love the market – once I am there, but it is the getting there that presents the challenge for me as I am definitely not a morning person. I need some time to draw myself together and certainly not at 4:45 in the morning!
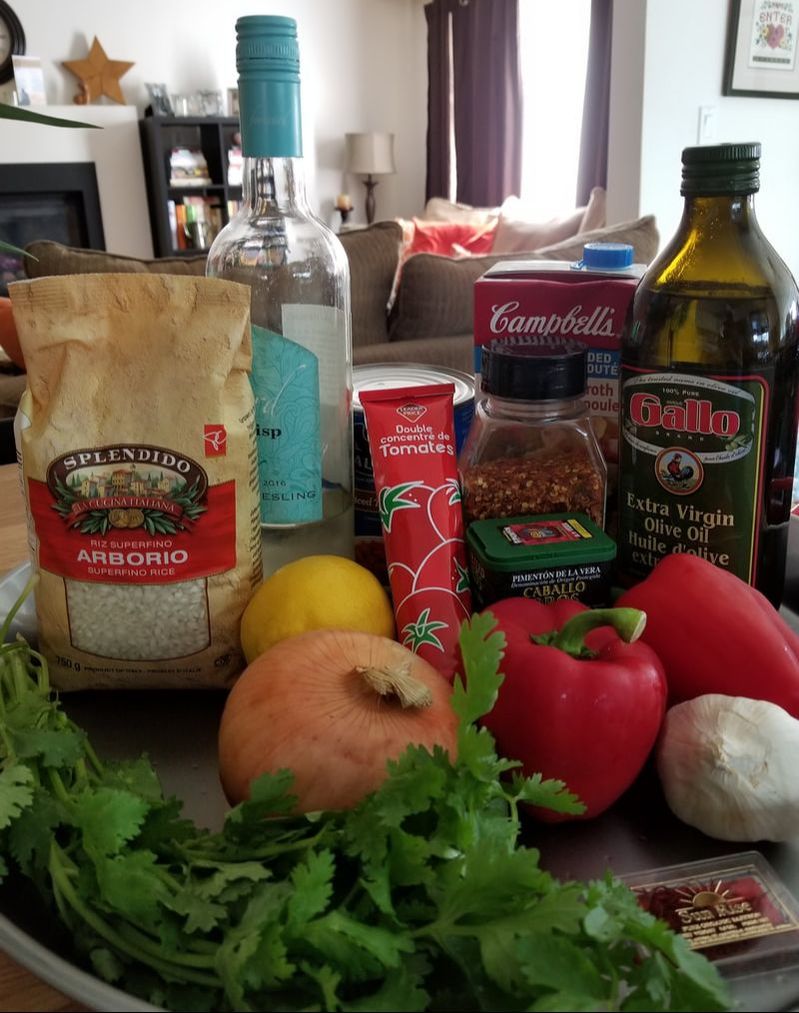
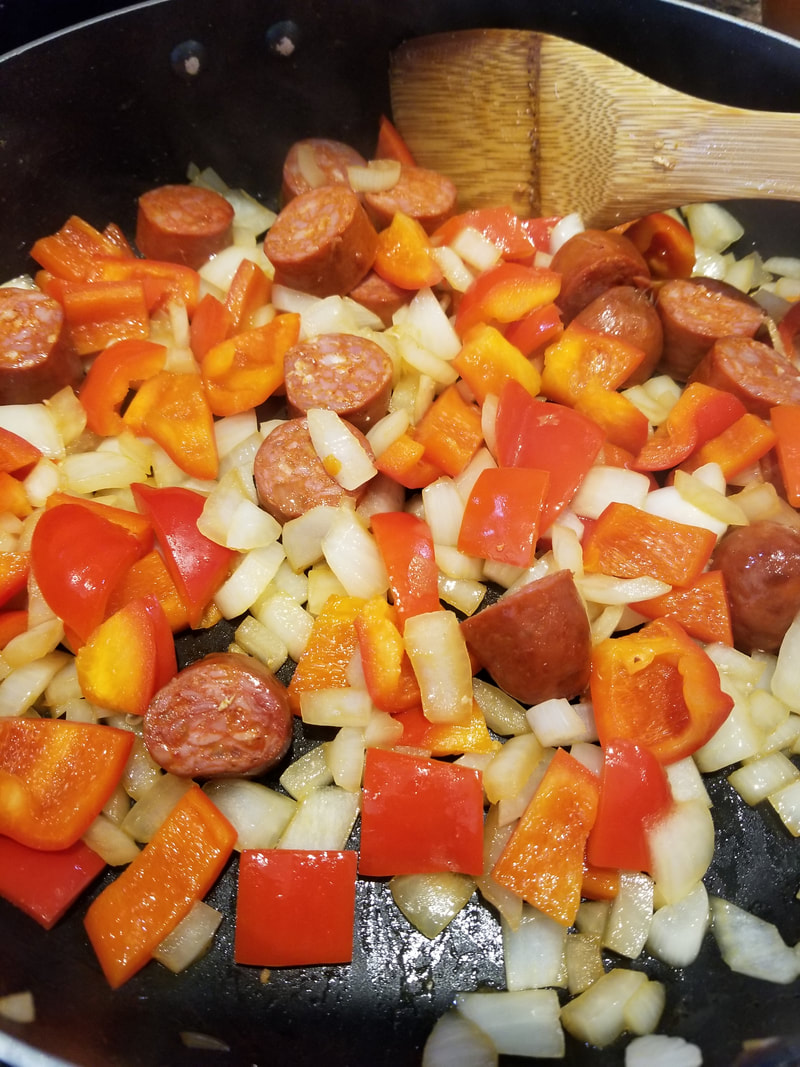
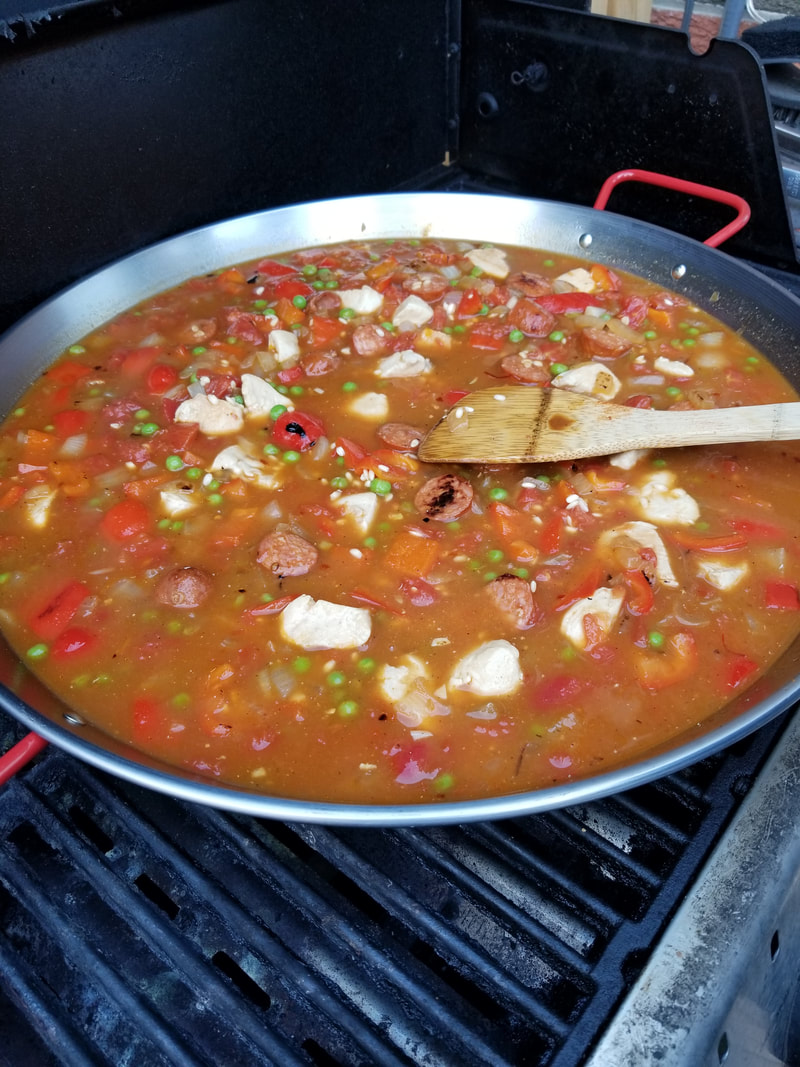
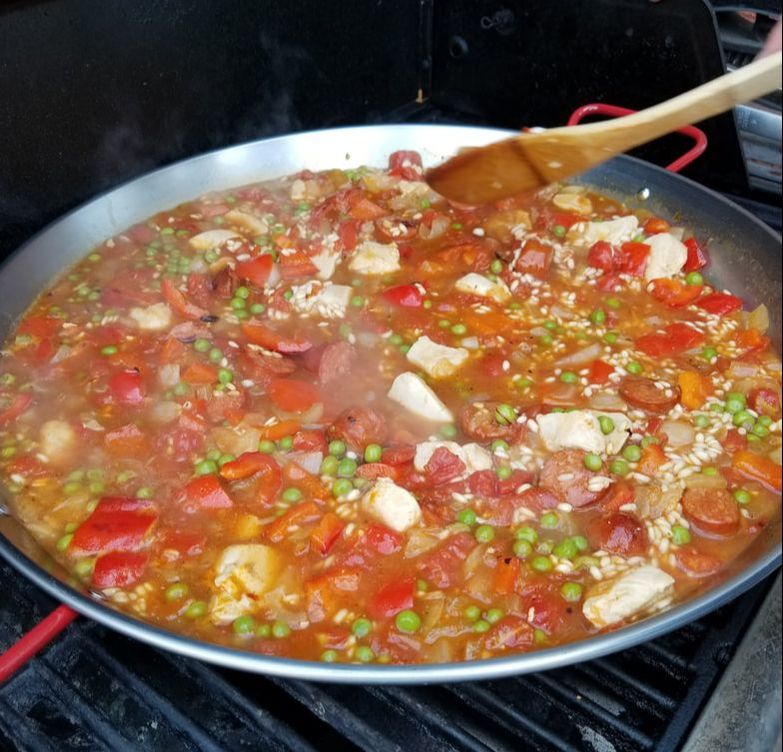
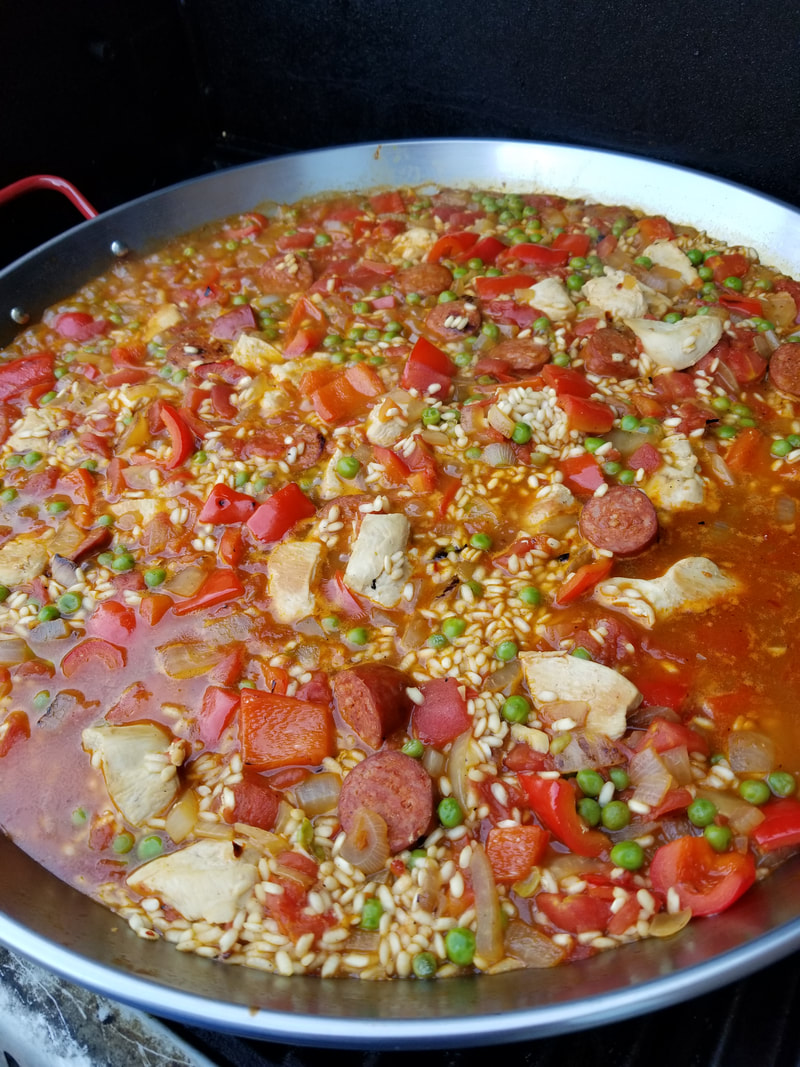
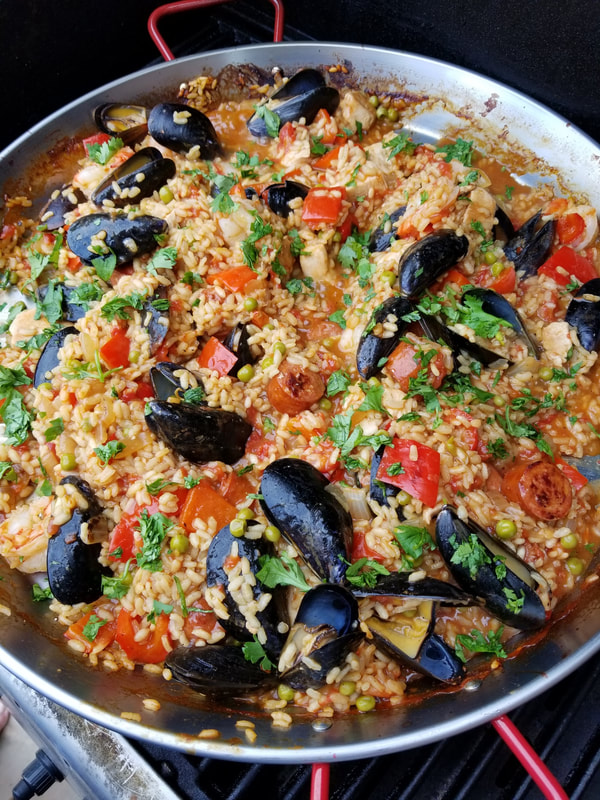
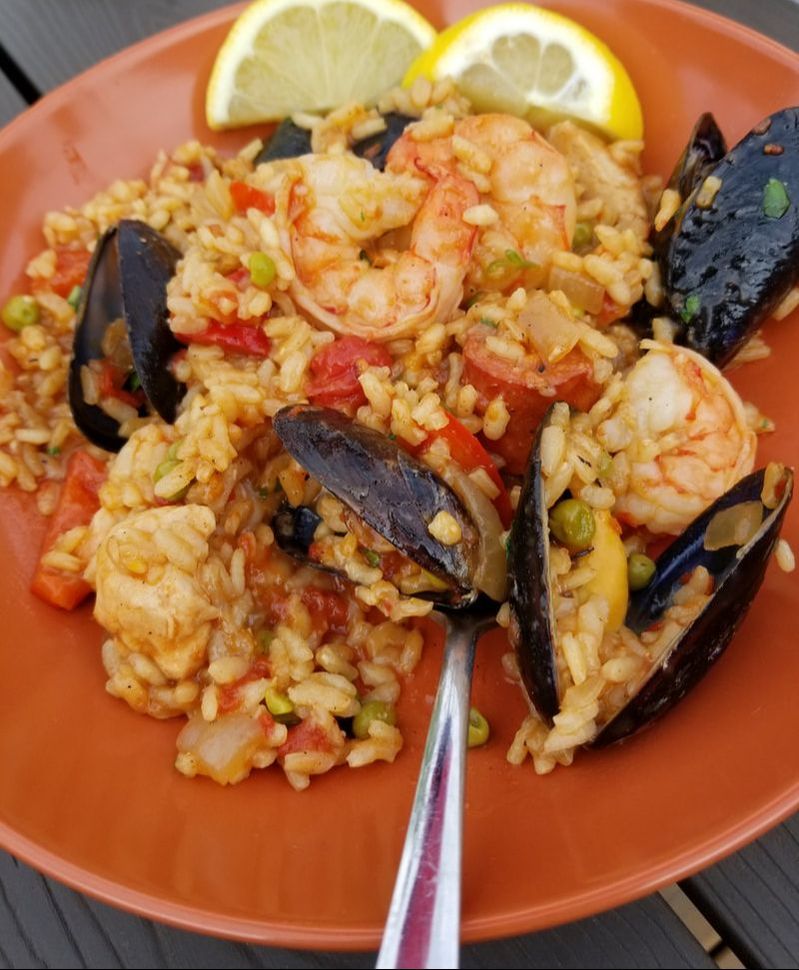
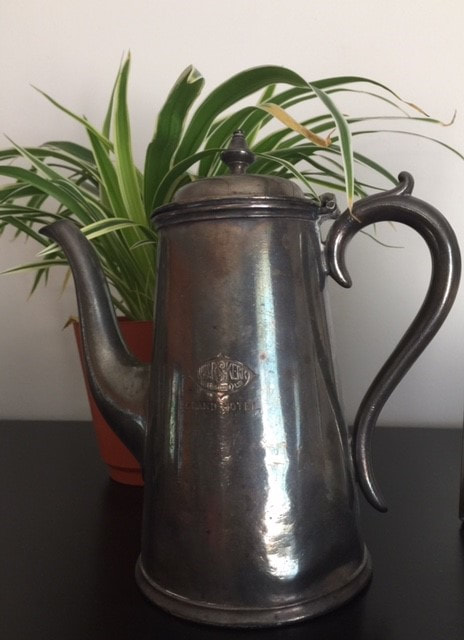
So with our shopping list written and double-checked, off we went to gather the chorizo sausage, seafood, saffron and of course some wine for our planned feast on the deck. I must admit that, that time of the day is lovely, once you wrap your head around it. Watching the sun come up behind us like a fiery ball in the sky in the side-mirrors of the car improved this cranky girl’s disposition. Our routine at the Market always starts the same way…Adrian gets a peameal bacon and egg on a bun and I get a fruit Danish to get our adventure going – some much-needed fuel for the market haul about to happen – especially this time. He was going to end up like a pack mule as I am restricted to lifting no more than 5 pounds for the next few months. He was going to need his strength! We have our favourite vendors at the market and in under an hour we had our list checked off as well as the extra lovely things that always find their way into our shopping bags and the one thing we always buy…lilies – orange ones usually, but this time, the promise of beautiful deep pink ones hidden in the still tightly-closed petals. So, full shopping bags and flowers in hand, we headed home with our haul. After a wonderful afternoon nap (I’ve gotten really good at those since being off!) we opened a bottle of wine, turned on some music and got this Paella going. I think you’re going to like this – it's flavourful, but not crazy hot – but if spicy is your thing, just amp up the heat by adjusting the spices to taste. Its also a great recipe if you have good friends coming as it makes a lot. I would suggest reading the recipe through as it is written in two parts – stovetop then bbq (although you can finish it in the oven if you prefer). Measure the ingredients in advance that you will need outside at your bbq and have them waiting on a tray ready to go for a smoother transition between stovetop and bbq. BBQ Paella 2 tbsp olive oil 3 boneless, skinless chicken breasts, cut into 1” chunks 2 chorizo sausage (mild or hot – you decide) sliced into ½” pieces 1 ½ cups Spanish onion, coarsely chopped 1 ½ cups red pepper, coarsely chopped 1 ½ tbsp garlic, finely chopped ¾ tsp chili flakes 2 tsp smoked paprika 2 cups arborio rice 1 796ml can diced tomatoes 1 cup white wine 2 pinches of saffron in ½ cup warm water (soak for 10 minutes or so) 1 tsp salt 3 ½ cups chicken stock ¾ cup frozen peas 8 jumbo shrimp, peeled and deveined ¾ lb fresh mussels, cleaned and debearded Fresh parsley, chopped for garnish Lemon wedges for garnish Heat oil over medium heat in large skillet and brown chicken on all sides. Remove from pan and set aside. It won’t be cooked through – it will finish cooking in the paella on the bbq. Quickly, nip out and start your bbq and place paella pan on the grill to warm. You want it to heat to 350 degrees. Alternatively, you could finish it in a preheated 400 degree oven. Add chorizo, onion and peppers to pan and cook about 10 minutes, until sausage has browned. Next, add garlic, chili flakes and the smoked paprika and cook for one minute. Add the arborio rice and stir well. Now out to the bbq you go… Scrape contents of skillet into the paella pan then add the diced tomatoes, white wine, saffron water and cook for 3 minutes. Add the salt, chicken stock and peas. Stir to combine and distribute chicken evenly throughout pan. Tent paella pan with foil and close lid of your bbq. Cook for 18-20 minutes. Next, nestle shrimp and mussels within the rice and cover with foil. Close lid of bbq and cook for 12 minutes or until mussels have opened. Garnish with chopped parsley and serve with wedge of lemon. Serves 4-6 greedy bellies Just before summer was over, my husband and I stole a few days away at a cottage and then spent the last few days of our week off relaxing at home on the deck. Well I call it relaxing…I have been told by a few people that I don’t know how to be on vacation because I always end up hosting lunches and dinners with those that matter most to me. It’s when I feel I’m at my best – unhurried and doing what I love most…feeding those I love. This vacation was no different than most – my nieces came for lunches and dinners and my cousin came for one last lunch out on the deck before the summer came to an end for another year. Of course, Marjory and I have been cousins our whole lives, but it has only been in recent years that we have become friends and confidantes. We text each other nearly every day, even if it is only to ask what’s for dinner. Through Marjory and her husband Tom, I have learned things about my family I wouldn’t have otherwise known now that both my parents are gone. Tom is a gifted storyteller and we have shared good laughs over great meals. It’s always fun. It was just the three of us for lunch that day – poor Tom was working while we enjoyed crisp, cool Pinot Grigio with a bistro inspired lunch. Marjory had brought me a special gift with a story to go along with it…a juicy tidbit about our Gran. Turns out, many, many years ago, my very proper Gran worked at the Grand Hotel in Glasgow, Scotland. This prestigious hotel was built in 1883 and forms the front of the Glasgow Central railway station on Gordon Street. My Gran had said that the head waiter had given her this teapot….but for whatever reason her own daughter didn’t quite believe it. We will never know for sure if it was a case of sticky fingers or was in fact just reward. Either way, it is mine to treasure now and it lives happily amongst my cookbooks. Marjory tells me that it cleans up very nicely with some silver polish but I love it the way it is…there is history (and possible larceny!) in it’s tarnish that I don’t want to wash away.
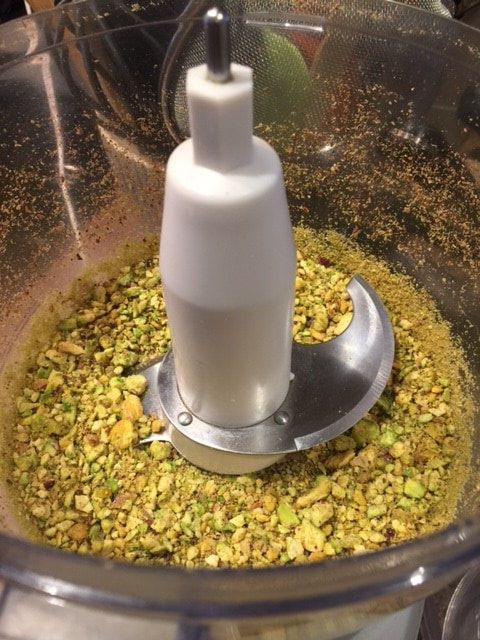
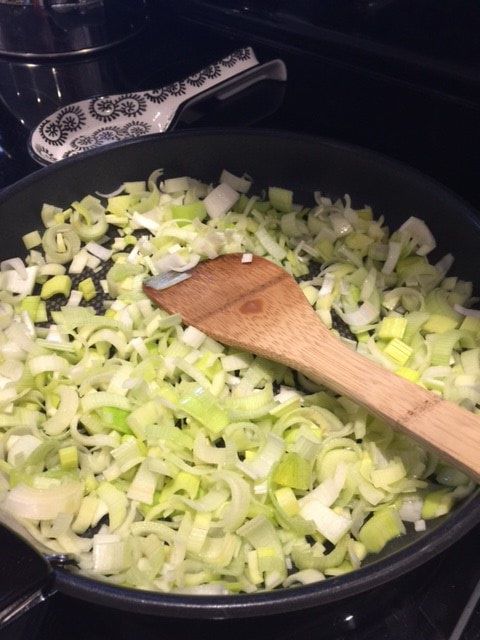
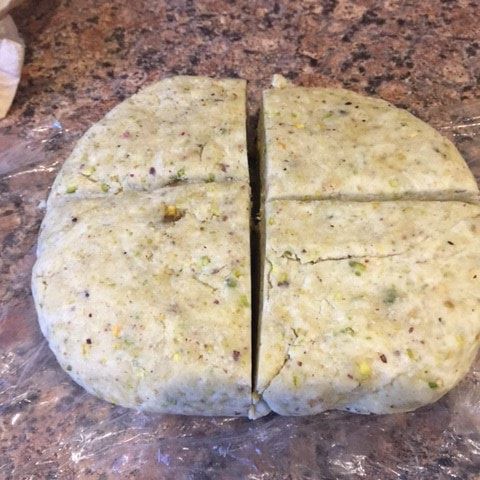
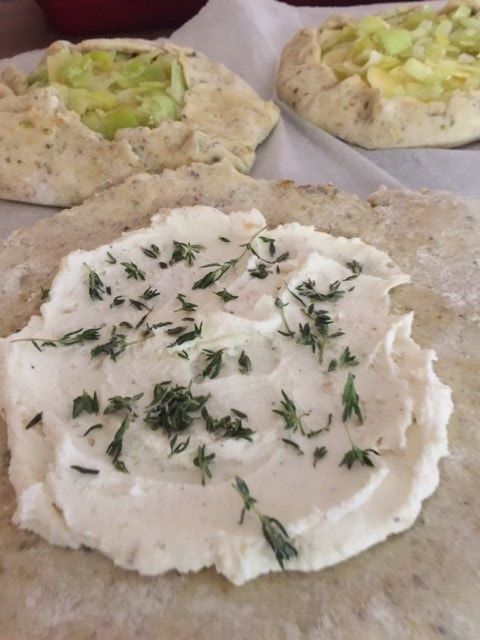
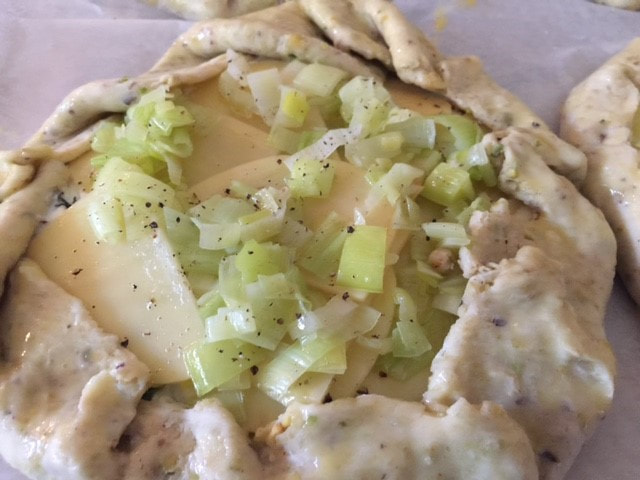
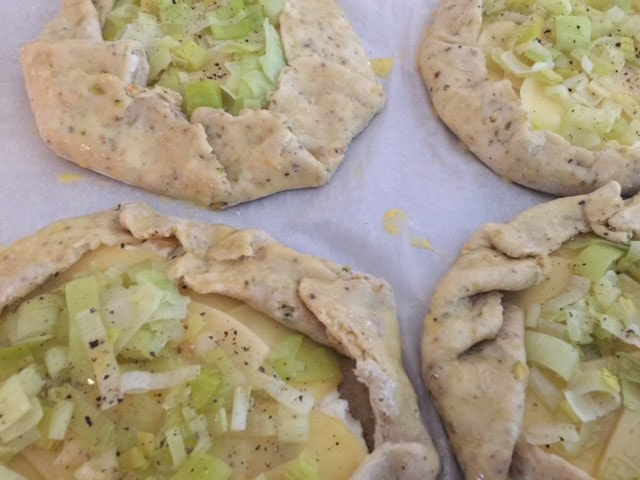
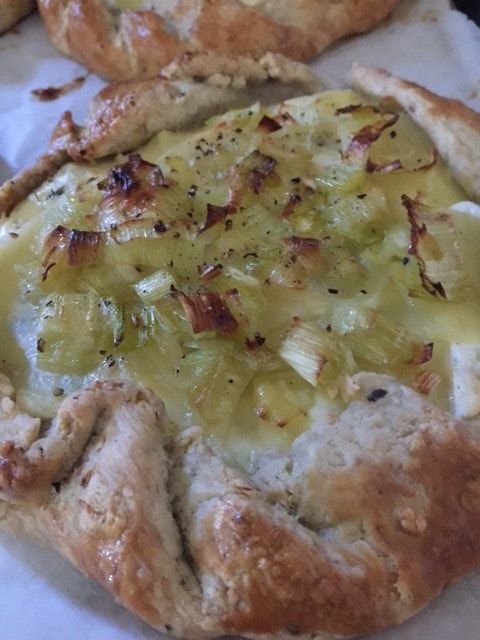
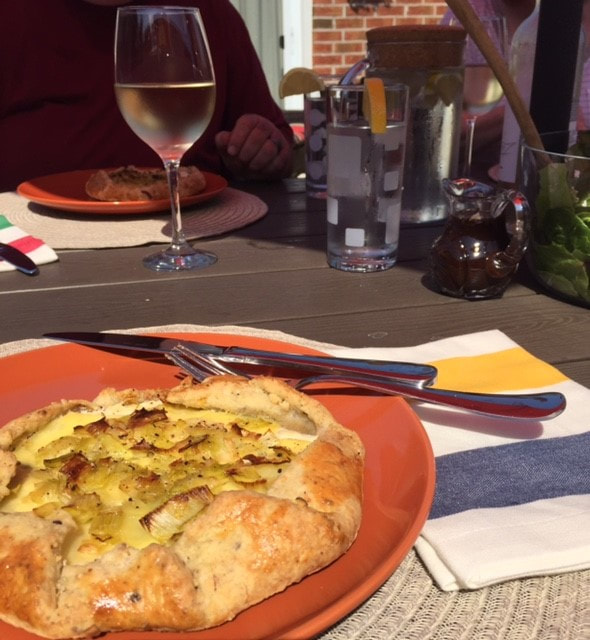
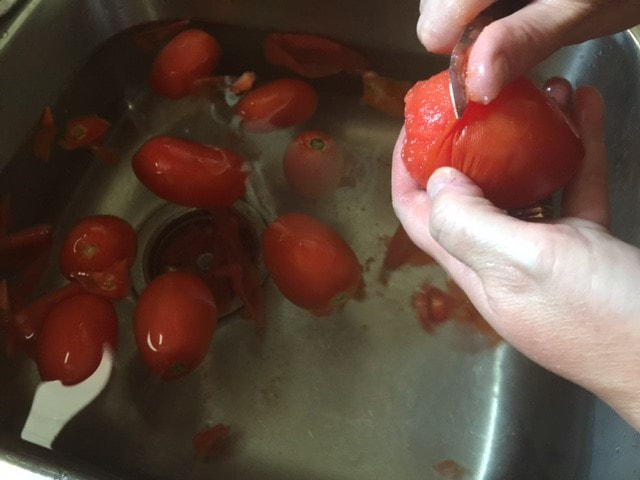
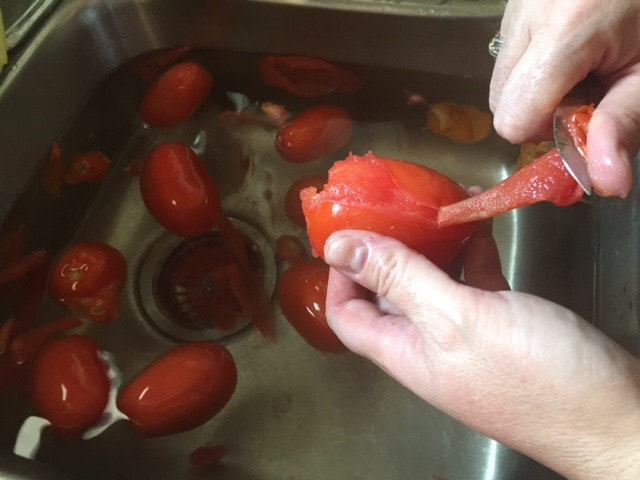
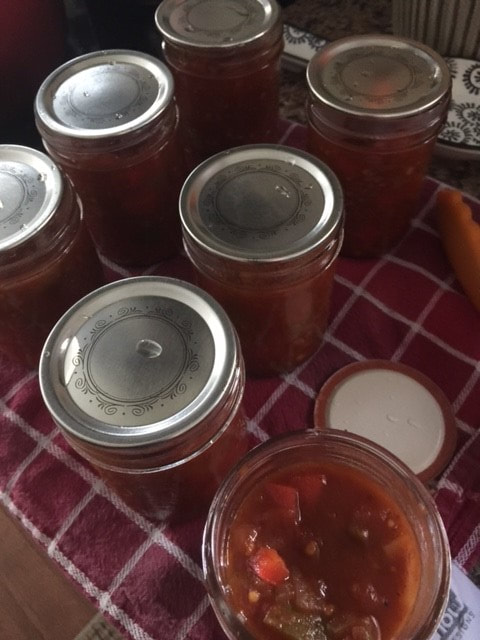
Leek and Potato Galette Adapted from Bon Appetit Magazine, October 2016 issue For the Dough: 1/2 cup raw pistachios 2 1/2 cups all-purpose flour 1 tsp salt 1 tsp sugar 1 cup (2 sticks) chilled unsalted butter, cut into pieces For the Filling & Assembly: 1 tbsp. olive oil, plus more for drizzling 1 large leek, white and pale-green parts only, halved lengthwise, thinly sliced 4 oz fresh goat cheese 5 tbsp. heavy cream 2 garlic cloves, finely chopped Salt Freshly ground pepper All-purpose flour (for surface) 4 tbsp. fresh thyme, , plus sprigs for serving 2 large Yukon Gold potatoes, thinly sliced 1 large egg, beaten Honey, for drizzling (optional) Using a food processor, pulse pistachios until coarsely ground. Next, add flour, salt and sugar and pulse to combine. Add the butter next and pulse just until a coarse meal forms. With motor running on low, slowly stream 1/2 cup ice cold water through feeder tube until dough comes together. Transfer dough to floured work surface and form into ball and flatten into disc. Wrap tightly is cling wrap and allow to chill for 30 minutes in refrigerator. Preheat oven to 400 degrees. Heat one tablespoon of the olive oil in skillet over medium heat. Add leeks and cook for about 5 minutes until softened, but now browned. Transfer to small bowl and set aside. Peel and thinly slice potatoes and set aside. In a medium bowl, mix goat cheese, cream and garlic. Season with salt and pepper and mix to combine. Divide dough into four equal pieces. On lightly floured surface, roll each piece out to an 8" round. Taking care, transfer each piece to parchment lined baking tray. Next, spread one quarter of the goat cheese mixture evenly over each round of dough, leaving a 1" border around the edge of each. Scatter one tablespoon of fresh thyme over each one and top with a layer of sliced potatoes. Drizzle each galette with olive oil and season with salt and freshly ground pepper. Scatter one quarter of the sautéed leeks over each galette. Fold over edges of dough, folding and tucking as you go round each galette. Brush the edges of dough with beaten egg. Bake the galettes for 35-40 minutes or until the potatoes are tender and the dough is golden brown. Serve warm with a drizzle of honey on each if desired. There is something about summer drawing to an end that makes me want to get into the kitchen and start canning things. I think it must be the slight chill in the air in the mornings that has my subconscious thinking about hunkering down for the cold months ahead. How wonderful to crack open a jar of summer’s bounty on one of those freezing cold February days when you are feeling like you will never be warm again. Those little jars, filled with sunshine, make waiting for those warmer days ahead just a bit easier.
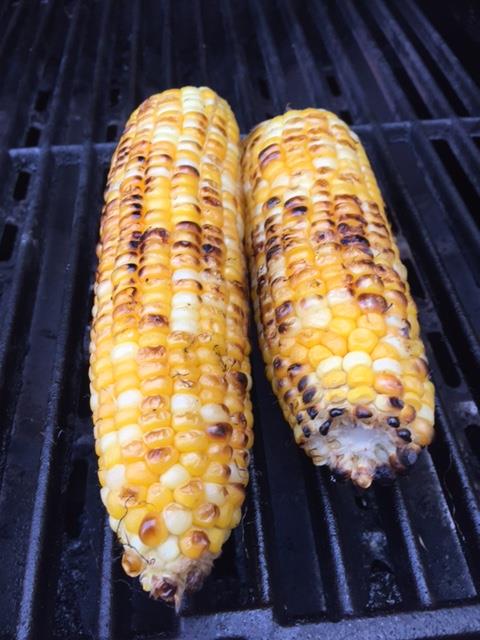
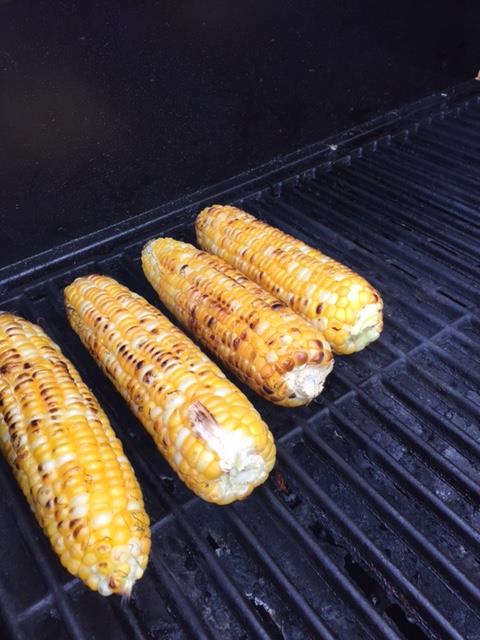
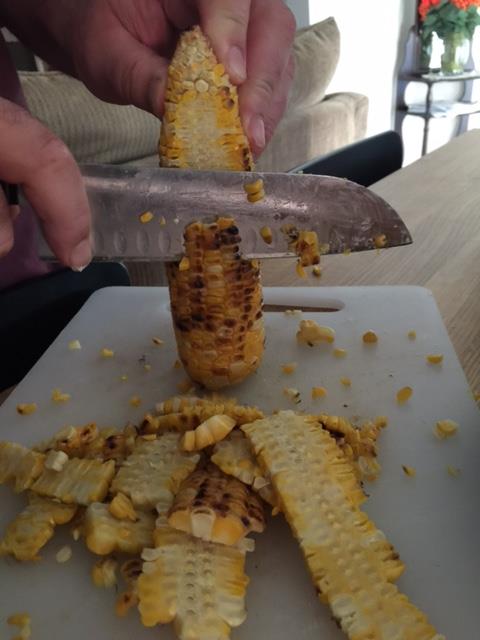
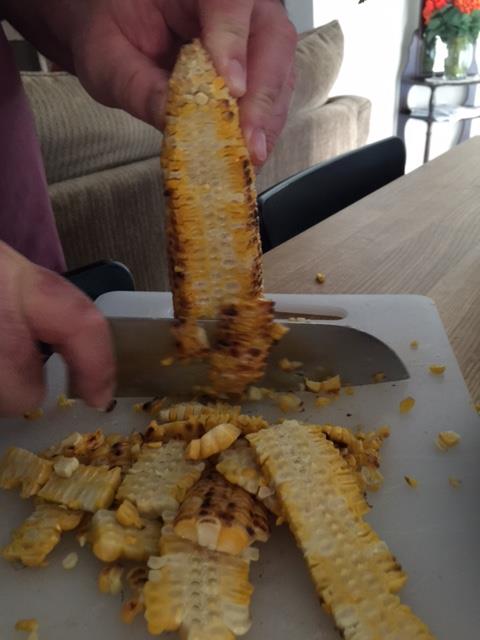
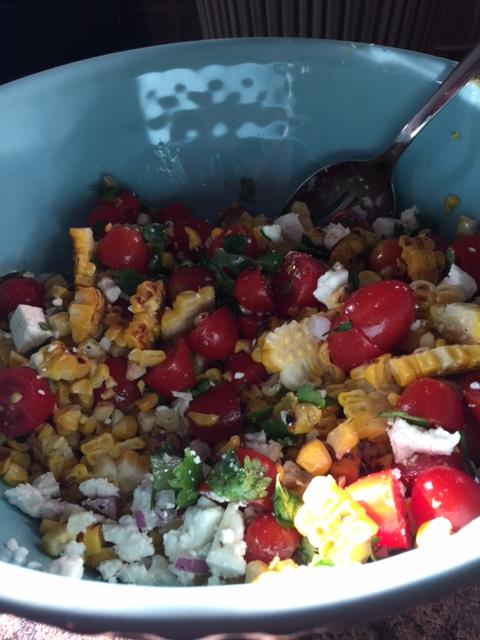
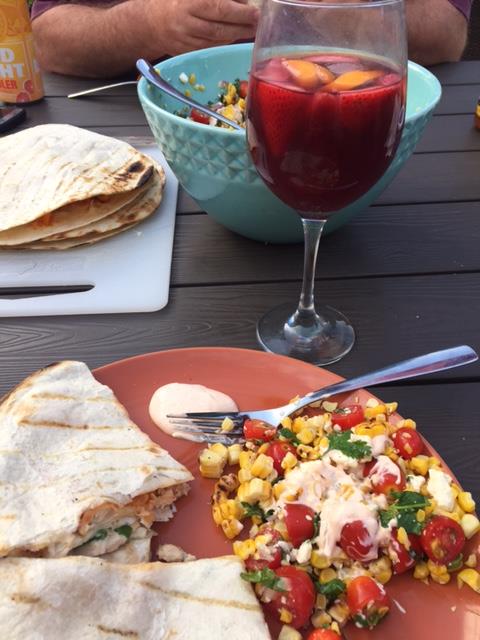
When I moved out of my parent’s home and into my own I really didn’t know how to cook. At all. I wasn’t sure how long to boil an egg for or even how to make scrambled eggs. Truth! In fact, my difficulty with eggs took a particularly embarrassing turn when we hosted a Christmas tree decorating party and I successfully made scrambled egg nog. Chunks in the egg nog! Good Lord how embarrassing to be asked what all the lumps were…I wanted to die. That Christmas, my Auntie Ann gave me a copy of “The Joy of Cooking” and it became my constant kitchen companion as I tried new things, with much trial and error. My boyfriend, now husband, still occasionally will bring up the chicken casserole with a stuffing topping and a few other adventurous attempts at impressing him with my culinary talents, such as the time I nearly caused a fire attempting to make fish and chips. You know the old adage…the way to a man’s heart and all that… Thank goodness that was not the case with him! My lack of skills in the kitchen could have had him running scared for sure. I started to voraciously read cookbooks like they were novels, each week bringing home large stacks from the library to consume. This is how I learned to cook because I hadn’t learned growing up. My mother wasn’t a good cook at all – she overcooked everything and my father was a practical cook…very good at hearty stews and soups, something he had picked up from his time in the Navy. All these years later, I have a huge collection of cookbooks and I still read them like they are novels, always trying and learning new things. But want I want to tell you Dear Reader, is that recipes are only guidelines. Years of reading recipes has given me a feel for what works and what doesn’t. For example, my husband isn’t crazy about dill so I will use thyme instead in certain recipes. If I feel like substituting red onion for Vidalia onion because that’s what my family prefers, that’s what I do. It’s not carved in stone. Unless you’re baking and baking is chemistry and that my friend is a whole other blog post for another day. So about that red onion. The recent issue of Food and Drink magazine (a fantastic freebie magazine put out by the LCBO here in Ontario which now you can access online!) has a recipe that piqued my interest. It’s summer time, hot and humid, and I live with a man who doesn’t want the oven turned on to further heat up the house (that is air conditioned!) Dinner, not to mention this little food blog of mine, can be a challenge. I’m always looking for sides that can be made on the bbq or on the stove-top. This recipe went perfectly with the chicken quesadillas we had. My husband bbq’ed the chicken and grilled the corn on the cob at the same time. The rest of it was just chopping and assembly. An easy-peasy, fresh summer side in no time at all. I think this just might become your new summer favourite...to serve at home or take along to a family bbq. Mexican Street Corn Salad Adapted slightly from Food and Drink magazine (2017 Summer issue) For the Crema: ½ cup mayonnaise ½ cup sour cream 4 tsp fresh lime juice Zest of 1 lime, grated finely ¾ tsp smoked paprika or ground chipotle pepper for a spicier kick Salt to taste For the Corn Salad: 6 cobs of corn, shucked ⅔ cup red onion, finely diced 1 pint cherry tomatoes, halved ½ cup fresh cilantro, chopped 2 tbsp extra virgin olive oil 2 tbsp fresh lime juice Salt and pepper to taste 4 cups salad greens (optional) 1 cup crumbled feta Lime wedges To make the crema, whisk the mayonnaise, sour cream, lime juice, lime zest and smoked paprika or ground chipotle pepper in a mixing bowl. Transfer to an airtight container and refrigerate at least 2 hours but for as long as one week. Preheat grill to high. Grease bbq grate and place shucked corn onto the grill. Cook, turning occasionally, until cooked through and slightly browned in spots, about 8 to 10 minutes. Transfer to a baking sheet and let cool completely. Stand corn on end and carefully slice downward with a sharp knife to cut kernels away from cob. Place corn in a large mixing bowl with the red onion, cherry tomatoes, cilantro, olive oil, lime juice, crumbled feta, salt, pepper and toss together until mixed together evenly. For each serving, place a little mound of salad greens in a bowl, if using. Spoon in some corn salad. Top with a dollop of crema and serve with lime wedges. (I skipped the greens and served it with a dollop of crema on top. Next time I make it, I am going to put the crema in a squeeze bottle and drizzle it over the corn salad for prettier presentation) Serves 6 Bye for now!
xx Hello? Are you still there? I haven’t posted since last September (!) and I guess you are probably wondering why and what I have been up to. 2016 turned out to be quite the year. Lots happened. Good things and bad things. Happy things and sad things. It broke me for a while. We bought our first home last May (happy thing)…It was exciting and hectic and continues to be…finally our own home! My great nephew Mason was born (very happy thing) in May too. A few months after we moved in, my cranky old cat Bijou died (sad thing) after being my furry friend for 19 years. It’s been nearly a year and I still miss her. What I haven’t told you is my Mum died too, about a week before Bijou. It all was just too much for my heart to bear and I couldn’t write about it here. It was just too hard. It still is. I debated whether or not to share this with you, but in the end, I decided to because this is life, my life and that is what My Cupboard Love is…life, love and stories from my kitchen. It isn’t always pretty. My Mum was a month away from turning 72 and her health had been fragile for years, but still it came as a shock. Over a 24-hour period we waited and watched her fade. That experience left me traumatized and I feared I would never be the same again. Like a lot of mothers and daughters, my Mum and I had a complicated relationship. It had always been that way. I loved my Mother – she just never made it easy. And now it never can be. It can’t be changed. That’s life…I just needed time to absorb that. It took me a while. I wanted you to know that I’m back now and although it has been a year of great happiness and profound sadness, I’m still here. I’m hoping you are too...I have missed you. I will be back here soon with happier stories and wonderful recipes for you to try. Come back soon!
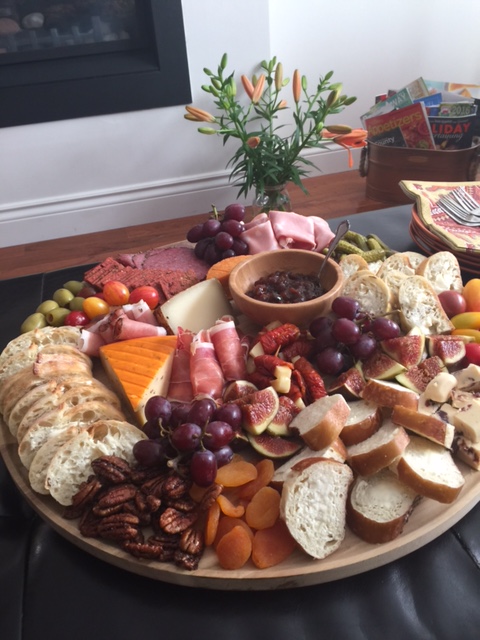
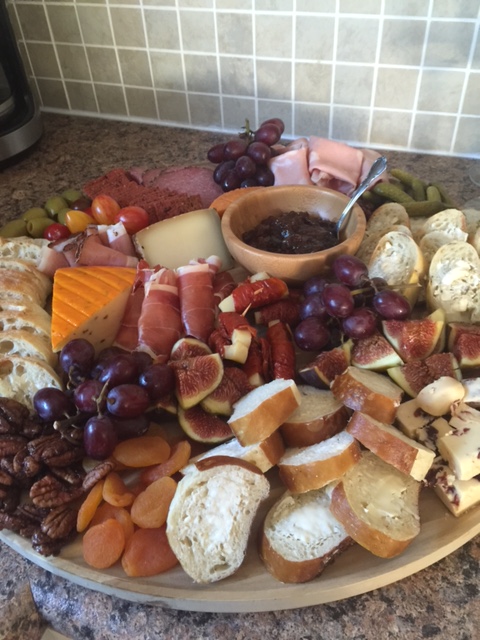
Sharon xx It has been a few months since our big move to our new home and we have unpacked most of the boxes Dear Reader. I have a nice, new kitchen that I will be sharing recipes with you from...I am so excited about it! It is very open and bright, a welcome change from my last kitchen which felt like a cave. I feel inspired again - it must be the warm afternoon sunshine that fills the kitchen...and my heart. It has felt like home to me since the first time I saw this house and now it is starting to look like it too. It's been a lot of work with a lot more to come...a new deck to be built in a few short weeks and a new fence in the Spring, not to mention the painting but we're getting there. I haven't bothered with a house warming party - instead opting for smaller, intimate gatherings with good friends and family. They have been much easier to arrange over the busy summer and nicer to host. Having fewer guests allowed for inclusive, catching up conversations. My kind of get-togethers. A few weekends ago, my cousins Marjory and Tom came over for the afternoon for the official tour and nibbles and drinks. I didn't feel like making anything too fussy - instead something we could graze on while we chatted in the living room. Had we had the deck built, it would have been a whole different story! I was up and out early the day before their visit and heading down to Scheffler's Deli at the St. Lawrence Market. As you know, it's a favourite haunt of mine - Ody, the owner, has helped me on quite a few occasions to choose the perfect cheese and meats to pair together. It is a bit of a trek since our recent move, but it is always worth getting up early for. So with his suggestions and a few bottles of nice wine, I put together this beautiful cheese board. It was easy to put together. I sliced assorted crusty breads, and then arranged olives, grapes, dried apricots, figs, heirloom tomatoes amongst the cheese and Serrano ham, mortadella, pepper crusted salami and provolone wrapped with sun-dried tomatoes. The only thing I "made", if you can even call it that, was the 5 Spice Pecans. Chinese 5 spice is a blend of spices, the most common being star anise, cloves, cinnamon, fennel seeds and Sichuan pepper. Mixed and made in under 15 minutes, these pecans are a tasty nibble for your cheeseboard. Some versions of 5 spice include ginger, which is what I used. It gives the nuts a nice warmth and would make a nice hostess gift at Christmas.
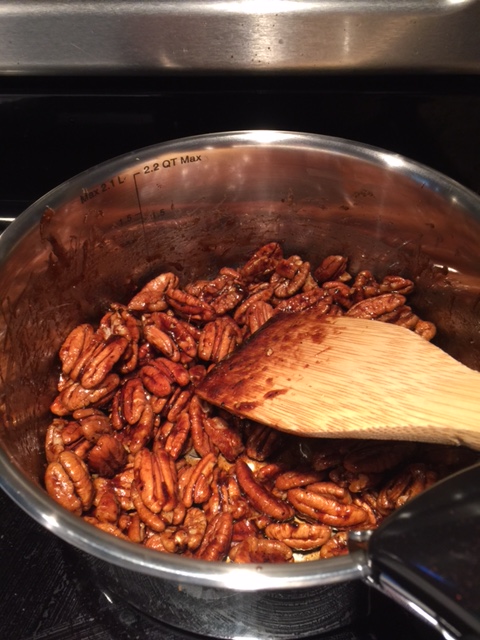
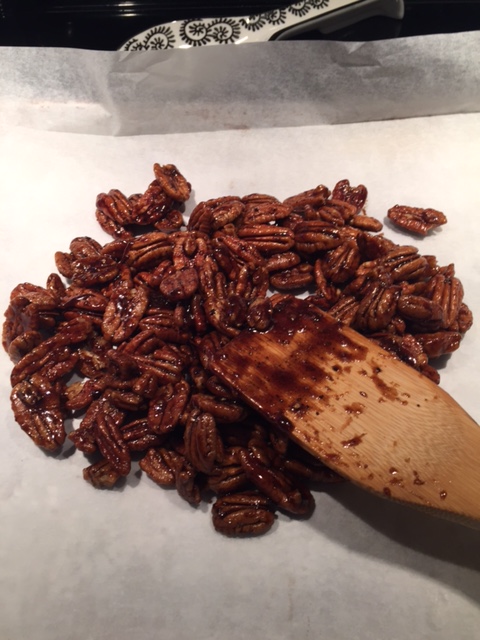
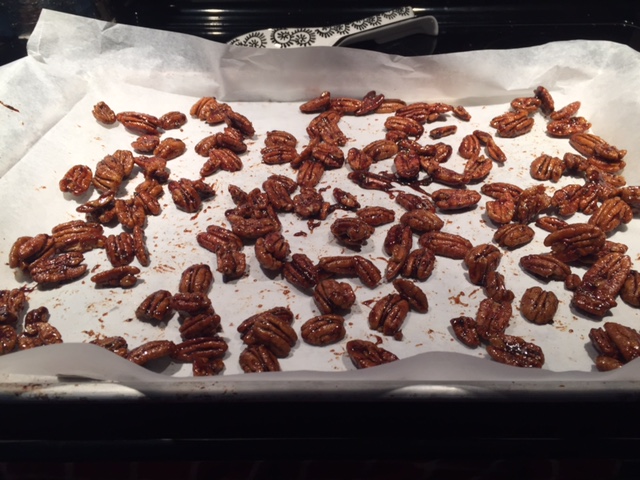
5 Spice Pecans 4 tsp vegetable oil 2 tbsp plus 1 tsp brown sugar 4 tsp water 1 1/2 tsp five-spice powder 1/4 tsp ground cumin 1/4 tsp freshly ground black pepper 2 cups pecan halves 1/4 tsp salt Heat oven to 350°. In a medium saucepan, warm the vegetable oil over medium-low heat. Add the brown sugar, water, and five-spice powder, ground cumin and freshly ground black pepper. Stir until the sugar dissolves and mixture bubbles. Add the pecan halves and stir until the pecans are cooked and evenly coated, about 3 minutes. Spread evenly on a baking sheet lined with parchment paper and sprinkle with salt. Bake until fragrant and crisp, about 8 to 10 minutes. Cool completely. Once cooled, break apart. |
Proudly powered by Weebly


